Musings of a Lady
Showing posts with label 18th century clothing. Show all posts

Sunday, April 20, 2014

Le Modiste: Polonaise gown for evening

My goodness, where have I been?  It is amazing how 'life' happens and you realize that many tasks that give joy are set aside for the practical, routine tasks that...well, let's face it,  we'd rather not do but seem to feel we must...like work, housekeeping, etc.  Ahhhh, the mundane business end of the stick that pokes you constantly when all you just want to do is play!  Sigh.

Anyway, I am back and posting about an impromptu gown I made for an event.  Yes, I thought that was a thing of the past.  Ha...ha...ha!  Ya, know, I just didn't want to wear the same thing I have worn for the last few evening events set in the 18th century.  No, no, no!  

I fished around in the pool of my fabric stash and found this striped silver and rust silk.  It is a shantung silk.  Yes, I know that it is not period to the time but I had it, it is pretty and well, the event I was going to was for fun and not for 'teaching history' - not a re-enactment in the true sense of the words.

The gown I based my design on is this one from the Victorian and Albert Museum collection:

Robe à la polonaise, English, 1775-1780. Robe and Polonaise of lustring striped in pale green, cream and two shades of purple, with boning and lined with linen.


I had just enough fabric to make the bodice, sleeves and the attached skirt.  Because of time, I machine stitched the basic construction ( used an overlocker for finishing)  but did the lining, finishing and the trimmings all by hand.  
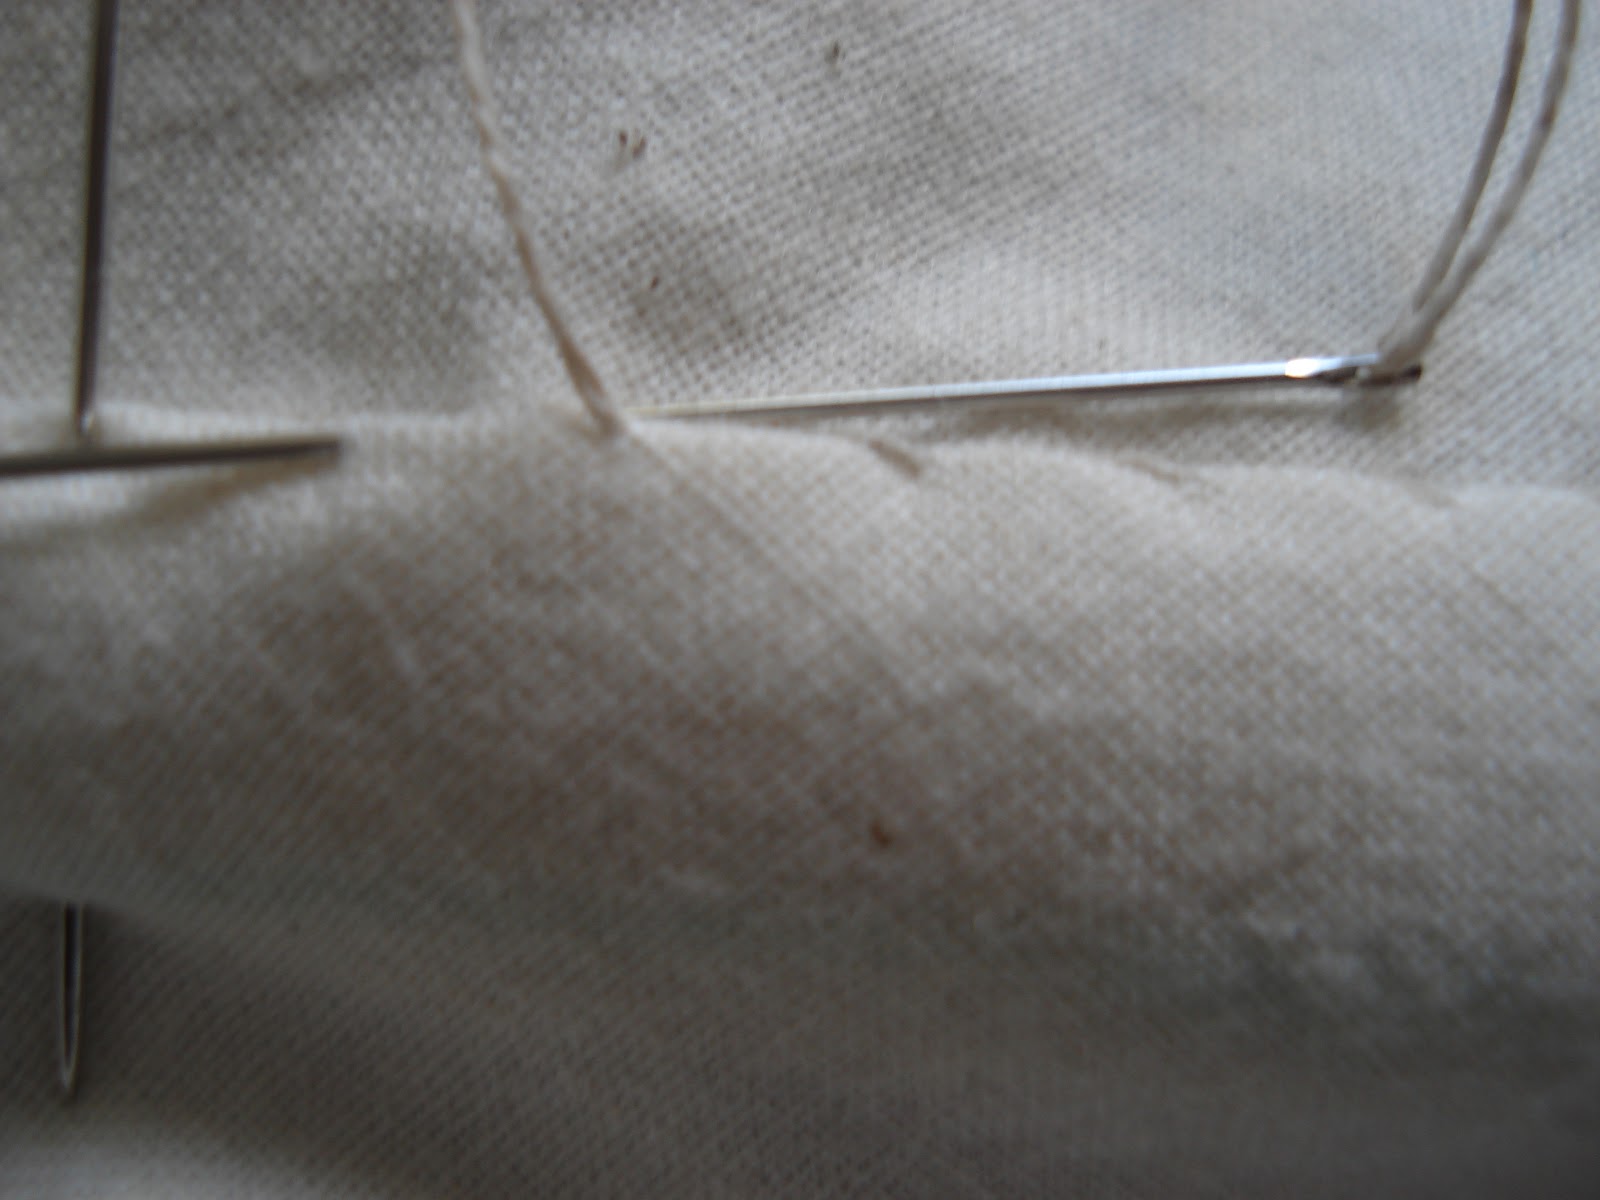
In construction with the sleeve trimmings in place.  I scallop-hemmed the edges and gathered at the same time to get the rushing I wanted and a nice interesting edge.  See two pictures below to see how I did it.


A close-up.  Ignore the overlocked edge underneath.  Like I said, time was not on my side...I was doing a whip-up, bang it out gown.  


These are the neck trimmings that I used.  The stitches to make it happen is at the top.


The underskirt was not what I had planned to use but I ran out of time, so I used an embroidered sheer skirt from another ensemble.


I did not want to wear a wig.  I went surfing on the net and found on Pinterest a pin that lead to a nice tutorial for hair.   http://locksofelegance.wordpress.com/2012/01/04/classic-georgian-hairstyle/

Locks of Elegance, is a nice blog!  As a visual learner seeing the step-by-step was great and easy for me to follow. The lady's hair in the tutorial is longer and thicker than my own but I was able to manage it, with lots of hair spray to keep my frizzy-fly-away hair in control.  Here are some pictures of the results:

I need a better curl...it needs to be attached better.  The  neck trimmings is visible as well.


The event was the annual Imperial Russian dinner at Babouska in Walnut Creek.  The restauranteurs were, as usual, gracious and the food was fabulous our evening was wonderful!


Now, I do need to get back to my Regency Wardrobe.  Bath, England is coming up!  September is the deadline but I really don't want to spend my entire summer sewing at the last minute!  So, next up, I am piloting a bib front gown for Laughing Moon Patterns, another day dress to be completed. The UFO's I had are done.  Following the bib front gown, are two evening gowns as I have nothing in that department.

Stay tuned!  And, thank you for your patience.  I will hopefully be able to post more often now.  The job is winding down...5 more weeks.  Then its freedom from the commuting, lesson planning and all. 

Cheers.

Tuesday, June 25, 2013

Le Modiste: Corsets, Corsets. Part 2

I had the privilege of having a friend help me draft up a period pattern for my 18th century stays.  I made a wool, lightly boned corset that might have been worn between 1770-1785.  I tend to wear fashions from that period so it made sense to use that.  Although this corset is machine sewn, the binding was hand sewn on and let me say, using leather binding is not going to happen again.  Yes, it is period to use it and probably will help the corset last a little longer - no bones poking through - but it was the devil to put on.

We used a period method of measuring my body with a paper tape that was notched in a particular way to note the lengths.  I was given a paper pattern which I then drafted up using the measurements.  I layered three fabrics one of the fashion wool and two of the linen.  Traced the pattern and left 2 inches alway around.  The patterns were basted along the outline of the piece, then based together along the basting lines.  I was fitted to the corset and followed that with adjustments and another fitting.  I had very little adjustments to make since the pattern was drafted to my specific measurements.  The corset was then constructed, bonded and bound.  Phew!  I have worn it twice now, and I so much happier.  My last two attempts using a purchased paper pattern were okay but they just didn't fit right.  I recommend having a corset drafted to you.

Without further ado, here are some pictures of the some of the process and the finished product:

Personalized drafted pattern.

Front piece cut, showing the 3 layers.

Basting for the fitting.
Corset complete.

Corset complete - side view.
I really must get someone to take my photos for me.  Anyway, I think if I do this again - not anytime soon, however, I think I would bone it more on the front and side fronts.  The corset gives me the proper cleavage and all but I think the shape could be a bit better.  Again, the leather bindings were very hard to do around the tabs.  The top edges were no problem, in fact, I was able to machine sew it down and then whipped stitched it down on the inner side.  But the TABS!!!!!!!!  I finally ended up making individual strips around each tab as trying to go around the curves at the junctions of each tab was horrible.  My fingers are still recovering.  Any suggestions for period binding other than leather and silk?  All suggestions welcomed.

Stay tuned for  Corsets, Corsets Part 3: Victorian corset.  Also, coming up soon are the results of my two sewing frenzy to make a picnic dress for a summer outing I went to this last Sunday.


Friday, June 14, 2013

Le Modiste: Pet en l'air

The Pet en l'air that I started way back in January is done. And it has been worn to two separate events since then.  The gown was made without any machine stitching.  All hand-done.  I realize I need to change my 'Statement of Purpose' on my blog home page, since it states my desire to make a hand-made gown in the future and that has happened!  :)  Without further ado, below are some of the process pictures and the final gown being worn to an 18th century Russian dinner in February.

The main pieces are put together and ready for binding at the neck.

The back pleats are sewn down through all layers.  I do have a lining that laces up the back underneath to fit the gown body to my corset.

The robings are added and the stomacher started.

Close-up of the trimmings using the fashion fabric.

I pleated the robings.

Back view of the decorated bodice.


 I do have enough of the blue silk to make a  ?.  I have never really wanted to wear the earlier look with the français or Watteau back or even the paniers.  However, this ensemble turned out really nice and the paniers or false pocket hips I got with a little altering (they were long on me) from Smiling Fox Forge, (http://www.smilingfoxforgellc.com ) worked out great.  Although the Pet en l'air was totally 'vegan' the undergarments were not.  Se la vie!

Stay tuned for more reviews of what I have been up to!

Regency Corset
1880's summer bustle gown for a picnic


Saturday, January 26, 2013

Le Modiste: Pet en l'air in the works

In the spirit of continuing to learn how to drape and work a gown by hand, I have begun another project worth sharing.  During the past holidays I began working with my sewing mentor Cynthia on draping and putting together a pet en l'air bodice and skirt.  This is an earlier fashion of the 18th century which I never thought I would wear as I am partial to the 1780's-1790's.  But, as I would like to make a Brunswick outfit in the near future and there is an 18th century dinner event coming up in February, I thought I would go with it and continue to build my hand sewing skills via the pet en l'air.  My inspiration has been:

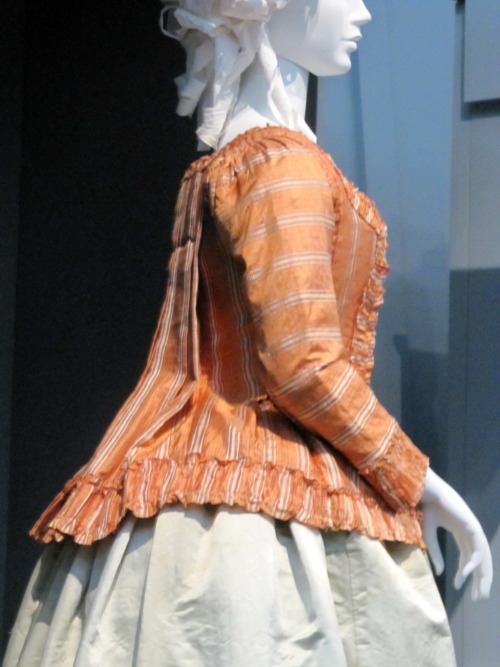
Pet-en-l’air jacket ca. 1780-1790 via Manchester City Galleries

Listed as a Caraco, 1775.  The petticoat is 1720- Kyoto Museum

Victoria and Albert Museum collection
Caraco jacket, LACMA, c. 1760 (altered 1780)
Though a couple of these images are listed as Caraco's, the trimmings and shape are similar to the pet en l'air.  Like many fashion trends over the centuries, different countries and cultures adapted fashion styles and gave them different names.  So, often times you can look up pet en l'air and you will get images of caraco's and casaquin as well.

I was down in Los Angeles, California in November and a friend of mine took me to the 'Garment District'.  This fantastic place of store after store of wholesale and retail fabric and trims is an overwhelming but fun place to get fabric at good prices and quality stuffs.  I live in the north of California where we don't have access to such a wealth of resources for sewing other than online shopping which is just not as satisfying as spending hours feeling-up textiles and trims!  Anyway, I was overwhelmed and couldn't decide what I wanted to buy for the pet en l'air and eventually the Brunswick, too.  So, I took swatches - yes, they give you hunks of swatches for the asking - and took them home to make my decision.  So, I decided on a beautiful deep, slate blue silk taffeta and a grey embroidered taffeta.  I am grateful to my friend who was willing to brave the drive to downtown LA and get the fabric for me and mail it up to me in record time! Take a look...

The blue taffeta to the left - it is a beautiful midnight blue - probably shot with black to give it its rich hue  - which I am told may not be very 'period' for 1770's.  The right piece is the embroidered grey.


Close up of the embroidered grey.  This looks blue but it is a nice pale pewter grey.
The blue taffeta is a dream to work on but the raw edges fray if you look at it.  The embroidered taffeta is beautiful, has a lot of body (stiff where the embroidery is heaviest) and that complicates working with it by hand but is still doable.  The embroidery is like tambour work and stiffens the fabric under it.  However, both fabrics together is a really nice combination.

I had to purchase hip buckets - again, this is not a period I usually do, so, that was an additional item I had to get to make this work.  Where did I get them?  I got them from Smiling Fox Forge. Yes, I could have totally made them but I didn't have the time since the dress is needed for the 1st weekend in February.  

At this point, I am trying to decide on the trimmings.  Again, I am running out of time...I hate sewing under pressure...but I can make simple trimmings to make do for the event then upgrade later.  
Any suggestions from you all as to the type of decorative trimmings I should use for the stomacher, robings and bodice skirt hem? Yes, I have my inspirations that I shared with you but there are other options that might be fun to have.  Send me links and ideas - I would totally love it!

Next Post:  Updates on the Pet en l'air and/or a 1930's day dress.

http://www.smilingfoxforgellc.com/  A great resource for re-enactors, esp.  18th century.


Friday, January 25, 2013

Le Modiste: Finally! My Enfourreau is done!


Hello everyone!  Last fall I started working on an en fourreau or English back gown.  The gown was draped and worked entirely by hand.  Laugh-ou-loud - a friend of mine calls this my vegan dress since a machine was not used.   I got to wear it to an event last Saturday and I have to say that I think I did a pretty good job.  Whoa, was I being a little immodest here?  Yep!  :)  I am really proud of this little ensemble.  I am sorry I don't have more pictures,  but the next time I wear it I will certainly make sure that I get more detailed shots.  Oh, notice the shoes!  I got my period mules from Burnley and Trowbridge (link will be provided below).  The mules are soooooooo comfortable and beautifully made.

Next post:  1930's day dress

http://www.burnleyandtrowbridge.com/  They are an excellent family owned business that provides period sewing supplies, garments and other items to support historical re-enactment.  They mostly focus on 18th century.  Check them out!

Wednesday, November 21, 2012

Le Modiste: En Fourreau Part 3

Although I have not posted in a while, I have not been idle.  The work on the Polonaise En Fourreau is continuing and I am nearly there.  I know that not everyone likes to do 'hand sewing' and it can be tedious at times but when 'chunked' into a manageable timeframe it is doable.  Firstly, I have no deadline on this dress so that removed a lot of pressure to be done by a certain time.  Secondly, I decided it was a learning experience and I would just take my time. Thirdly, I do love hand sewing! With that said, it was totally fun working with two friends - one doing the coaching and the other also learning to drape a gown in situ.

Let's see where did I leave off? Ah!  I was sewing down pleats and getting ready to put in the sleeves.  Well, let's take a look the next steps I was able to get done in the process:

Fashion fabric and lining.

Right sides together the fashion fabric and one side of the lining are pinned and sewn together.

The lining not sewn into the previous seam is pinned to sandwich the raw edges inside b/w the fashion fabric and the lining.

Lining is whipped down.

The sleeve edges (FF and L) are turned in and whipped down.

Sleeve ready for setting.


Bodice with pleats done ready to be pleated to skirt.
Now before I set in the sleeve I also had to attach the skirt fronts to the skirt back.  Remember the skirt back is a part of the bodice.  I left slits at the top of the seams to allow for access to my pockets.  The skirt side back to front was pleated into the bodice and the bodice lining was placed over the pleats to sandwich the raw edges inside.

Skirt pleated on to the bodice and lining folded and pinned in place

From the outside prior to sewing.
There was since of accomplishment when I put on my corset and my friends helped me into my dress, albeit not done but looking like a real dress!  It was so cool!  Yes, I have made gowns before but this was different, just different - hard to describe if you haven't made a dress without a pattern and all by hand.  This is not for everyone of course, but if you ever get a chance to do it, go for it!

Next Steps - The shoulder straps to be pinned and sewn in place in situ.  This will be followed up with pinning the sleeves on while the dress is on the body prior to sewing on to the bodice.  Once that is done, I will need to finish the back neck edge, hem the skirt and then begin to make the matching petticoat.  Almost there!  :)


Saturday, October 13, 2012

Le Modiste: En Fourreau Part 2

Hello!  I  have been making progress on the Polonaise en fourreau.  What I am working on now is the back piece.  The back is one piece of fabric that starts with a dart from the neck to waist (1/4" to 2") then pleated while on the body to create the shaped 'V' and then the inverted pleat at the 'tail-bone'.  This was done with the fashion fabric.  The lining is a rectangle cut the length of neck to waist and darted just the same but not pleated.


The lining is folded and darted.  It is then attached to the fashion fabric which is darted then pleated and pinned in place.

The pinned pleats - I ironed them to help me keep it even.

Detail of pleats pinned.

Sewing through all layers I am using a Mantua stitch. I think mine are too close and tight. Not sure.

When you are done the inside looks like this.

Detail:  The stitches.

I am using linen thread.  It is thicker than regular modern cotton covered poly threads we have now.  This was borrowed from a friend till I can order what I need from Burnley and Trowbridge.
http://www.burnleyandtrowbridge.com/


Next up:  Finish stitching down the pleats, then cut and put the sleeves together.  The sleeves were draped on my arm - using an extra piece of lining fabric and I will use it as a pattern.

Monday, October 8, 2012

Le Modiste: En fourreau or English back - Part 1

100% Linen, Indian Printed.  Oatmeal ground.
One project I have always wanted to do is a totally hand-sewn gown.  That particular dream is coming true and I am really excited.  A dear friend is helping me drape on the body and create a polonaise en fourreau gown.  I am using the above linen which I have been coveting at Discount Fabrics in Berkeley, California for a while.  It is 54" wide and I bought about 4 to 5 yards.  Should I have been using something from my 'stash'?  Absolutely!  Yet, I just couldn't resist.  In fact I consciously decided that if I am going to put that much work into it I might as well use something nice and that would encourage me to keep up with the project.

The first thing we did was to drape the front of the bodice over the corset.  The front bodice piece includes the side back, so there is no side seam.  Also, the center front is not cut on the straight which I found interesting as I was always taught to draft on the straight at the center front and back.  With that said, the drape of the fabric does work with the conical shape the corset gives you and there is less to do to make the shape develop.

Once you have the piece cut, (which you can do in muslin which I chose to do instead of actually starting with the fashion fabric), the draped piece becomes the pattern for the both the lining and fashion fabric.

The draped pattern piece.

Hand stitched the fashion fabric and the lining using a whip-stitch.
Whip-stitched the fashion fabric to the lining which was turned so the lining is offset from the edge.

Front pieces done except at the side back seam/shoulder/armhole - will be done later.

The back piece was measured on the body by taking a length of fashion fabric and measuring from the back neck to the waist and wee bit below.  I then created a dart down the center back starting at 1/4" and out to 2" at the waist using a back-stitch.
Center back dart pinned.


Back stitching the center back dart
Sources:
  • Costume Close-up: Clothing Construction and Pattern 1750-1790, Linda Baumgarten & John Watson with Florine Carr, Costume and Fashion Press QSMC.W 1999
  • Seventeenth and Eighteenth-Century Fashion in Detail, Avril Hart and Susan North, Victoria & Albert Publishing, 1998.
  • Cut of Women's Clothes, 1600-1930, Norah Waugh, Theatre Art Books, 1985
  • Costume in Detail, Nancy Bradfield, Plays Inc., 1975


Next up:  Drape and stitch the back pleats of the bodice-skirt.  Also, drape the sleeves and make-up.