Musings of a Lady

Sunday, May 25, 2014

Le Modiste: The Pelisse has been started!

I decided to work on the Pelisse, woman's outer garment; a military inspired coat of the period between 1800 and I believe, 1830.  The word Pelisse originated with fur-lined short jackets worn by the hussar light calvary soldiers.  I am sure there is more to the history of its origins but as an early 19th century woman's garment it takes on different characteristics as the fashions progressed from the Grecian look of the 1790's to the Romantic look of 1830's.   I based my design on several extant and yes, movie images.  These are my favorites:
From the Movie 'Bright Star'.

1813 with a little capelet.
My basic fashion sketch of my interpretation.
The fabrics I chose to use are a pale celadon, light weight wool with a blue-green shot silk for the detailing.  I began with the La Mode Bagatelle spencer pattern to start with and altered it to eliminate the princess-seam front and put in a bust dart. I also crafted a lapel and collar using, albeit a modern, how-to book from the late 1940's.
I had to drape the collar - which I like to do.  
I have not been rushing through this project, which feels really good!  The main construction or seams are done by machine but, I am doing all the finishing and detailing by hand.  For example, I used the prick-stitch to attach the contrast fabric to the lapels and the collar which is a period method of hand sewing and top-stitching at the same time.


I managed, this week, to get the sleeves cut out and sewn in as well.  I had to make some adjustments as the shoulders, for whatever reason, needed taking in as they extended over my shoulder point.  I had a fitting and it was fine.  I think after the fitting of the mock up I forgot to take off the excess. Anyway, with a few stitch, unstitch and restitch moments, I got the sleeves in where I like them.  (Note on the pictures below: The mannequin I am using has no bust at all but almost matches my shoulder width and waist length - it is a vintage piece - so, I am using it as my staging and quick check mannequin.  If the bodice looks long that is why).


Not the best shot of this but I am loving what I have so far!
Before I attach the skirt and line the bodice I want to do the buttonholes and buttons. I think that will be easier while there isn't so much fabric from the skirt to manipulate as I sew.  I plan to do the buttonholes by hand and create fabric covered buttons using period methods.  I checked in with my hive-mind on hand sewing and all recommended that I practice first!  So,  I have!  In the past I have always used a machine or I made bound buttonholes.  My latest machine is not good at making consistent buttonholes and bound buttonholes are not period, as far as I know.  To practice, I did two:  one with the picot edge at the inner edge and one on the outer edge of the buttonhole to see which I liked better.  I think the first is more period.  

With the picot on the outer edge.

Picot on the inner edge...more period.

Another image of both...

Next up:
Try on with corset/garment on and make adjustments.
Buttonholes, cover the buttons and attach.
Make contrasting cuffs and attach to the sleeves.
Cut and construct skirts - line them and attach.
Line the bodice by hand.
Do all finishing (hemming, etc) by hand.


Sunday, May 11, 2014

Le Modiste: Day Dress #2 - Black and Cream cotton print

Hello and Happy Mother's Day to all ladies who are nurturing, loving and supportive of their loved ones!

Well, I am moving right along with my day wear for the trip to Bath.  As of my last post I have:
1.  Finished the one UFO I have been working on for a while.  The buttonholes are in (not the best job in the world but it is done).  Buttons attached as well.
2.  The black and cream dress is done except for the hem.  Hurrah!

Here are some pics:
I lined it in white cotton.  The apron front is just the skirt, no bib.


Here is the back where the apron strings loop through self-fabric loops and helps keep them up
when tied at the center back.


Not hemmed yet.  This was the last fitting before hand finished seams, etc.

I hope to have better pictures later of the gown hemmed and with a chemisette and all the trimmings.  Taking selfies is not my best talent.  I don't seem to get the best light or  a clear image.  I really like this gown and think it will be a good one for the Bath trip along with the one I made from Laughing Moon Pattern. (http://lachatelainechocolat.blogspot.com/2014/05/le-modiste-back-to-regency.html).

Next:  Either my summer wool pelisse or one of the ball gowns.  I got my fabric from India.  I decided to go with vintage saris.  The vintage ones are not so garish and modern looking.  I found two that I liked: a peach with gold and  a navy blue with supposedly, silver.  Well, the peach with gold is not silk - it is called art silk - so it is a man-made fabric.  I was bummed but I am going to make it anyway.  The blue is great and is a cotton.  But!  The silver turns out to be a cool gold. Bummer again, but what do you expect for $16.00 a piece?  I am still going to use both of them. Here is a sneak peek of the peach:
This part I want to use for either the bodice or the sleeves.

The scallops may be a good detail to line and cut to add to the sleeves or at the waist b/w bodice and skirt.

This is the border trim which I will use around the hem or if I do an open robe gown as trim down the front(?)


Though I have not found an extant gown or fashion plate that inspires me, I am looking!  The great thing about saris is that you have about 5.5 yards of fabric at least 45 to 50" wide to work with.  At one end there is an intense set of embroidered panels from selvage to selvage and about 3/4 of yard depth into the yardage.  You can get up to three to four different patterns.  The rest of the fabric usually has a very simple sprig overall embroidery or plain except for the borders which are usually on both selvage edges.  In 2009, I went to a class at Costume College  (Southern California) and took a workshop with a woman who made a science of turning saris into Regency gowns.  I remember bits and pieces and that she totally draped hers.  I will use patterns where I can and drape the skirt.

Now to get on with the adventure!  Again, Happy Mother's day to all the Mom's in this community.  I include my fellow sisters who do not have children in this wish.  We are mother's, too, in our own way! I am sure that there are friends children, students, friends, siblings, and anyone really that we have all mentored, loved, supported and/or nurtured...including our furry friends.  Happy mothering day to all.  Cheers.

Addendum - Of course after I posted this I found a gown to possibly use as a basic design for the peach fabric.  I also found a picture of the blue sari fabric as well.  So, I will add:

Philadelphia Museum of Art - Collections Object : Woman's Evening Dress 1817


I am not a fan of the fashions getting closer to the 1820's.  A bit tooo fluffy for me.  I like the simpler fashions of 1800-1810 and just before 1815.  I think the sari fabric will lend itself to this type of design but I am still on the look out for extant fashion plates or gowns a bit earlier with the same 'sari' fabric look.
This a yardage view of the peach or amber sari from the decorated end.
Oh and here is the blue sari fabric.  This is what I got on the internet when I bought it but it is really a very cold gold not silver.  It is pretty though:
I am not going to use the decorative end for the gown.  I will use the striped part above (at the top of the image) for the sleeves.  The plainer yardage - not in the photo - I will use for the bodice and skirt utilizing the simpler border embroidery on the selvages.  Okay, stay tuned for the next posting.  I hope to have started one or the other: pelisse or ball gown.  Cheers

Sunday, May 4, 2014

Le Modiste: Back to the Regency!

The spring weather here in Northern California has been delightful.  We had a hot spell where even in San Francisco it was 89F - way too toasty for fog loving San Franciscans but just right for me, being southern California born.  Anyway, we are now back to Goldilocks-just-right temperatures and spring is busting out in greenery, flowers and singing frogs!

After a brief and very quick explosion of striped silk that ended in a polonaise that I quite like and enjoyed wearing, I am back to the Regency wardrobe I am preparing for my trip to Bath, England for the Jane Austen Festival in September.  I thought I would have a lot more done by now, but life happened.  Now, I am beginning to make progress.

Here is what I have been doing:  I am nearly finished with two UFO's. Hurrah!  The day dress I up-cycled by recutting the bodice needs buttons and buttonholes.  I did finish a boned-bodice petticoat which just needs to be hemmed. (I see a pile of handwork building up...)

Before I could attack said handwork, a great opportunity came my way.  I was given the privilege of testing a pattern for Laughing Moon Mercantile.  It is a new release and is available and fabulous!  http://www.lafnmoon.com/product_p/p126.htm.


The pattern has several options using an apron/bib front construction.  I have never used a Laughing Moon Pattern before but had good reviews from friends who have.  What makes these patterns fabulous are the detailed instructions, multiple sizes, good paper that doesn't rip when you look at it, and Laughing Moon knows how to work with different figures.  The instructions for taking your measurements is really important and for the first time with a commercial pattern I had to do no major adjustments to the mock-up.  In fact, when I tried on the mock-up, I couldn't believe that there was nothing to fix or adjust other than the length (I always have to adjust the length). I was so astonished that I called a friend, who was also testing and she has a different figure than myself but did not have to adjust anything either.  Whoa!  Here is how my gown began and finished:


I had planned to make the detachable long sleeve which is basted in and removed as desired.  But, I didn't have enough fabric.  Sigh.   Anyway, I am pleased with how it turned out and give many kudos to Laughing Moon Mercantile for another successful pattern.

With this gown done and added to the wardrobe, I have start work on another day dress.  The gowns of inspiration are:
Green and orange cotton print pelisse-dress. c1815 Met museum

Dress (ladies). Floral motif. Dark blue with scattered flowers printed in white and light blue. Linen / flax printed. Around 1825 - 1830. Dimensions: height 133 cm. National Swiss Museum webcollection.lan...
The fabric I am using is a cotton that comes close to these period patterns:
V&A Fabric - Leaf (Green)||RF20F, Found on vandashop.com - this is reproduction based on a Regency pattern from the Victoria and Albert Collection.

Dress fabric 1805-7 Manchester galleries
My fabric is dress weight cotton in  black with off white print:

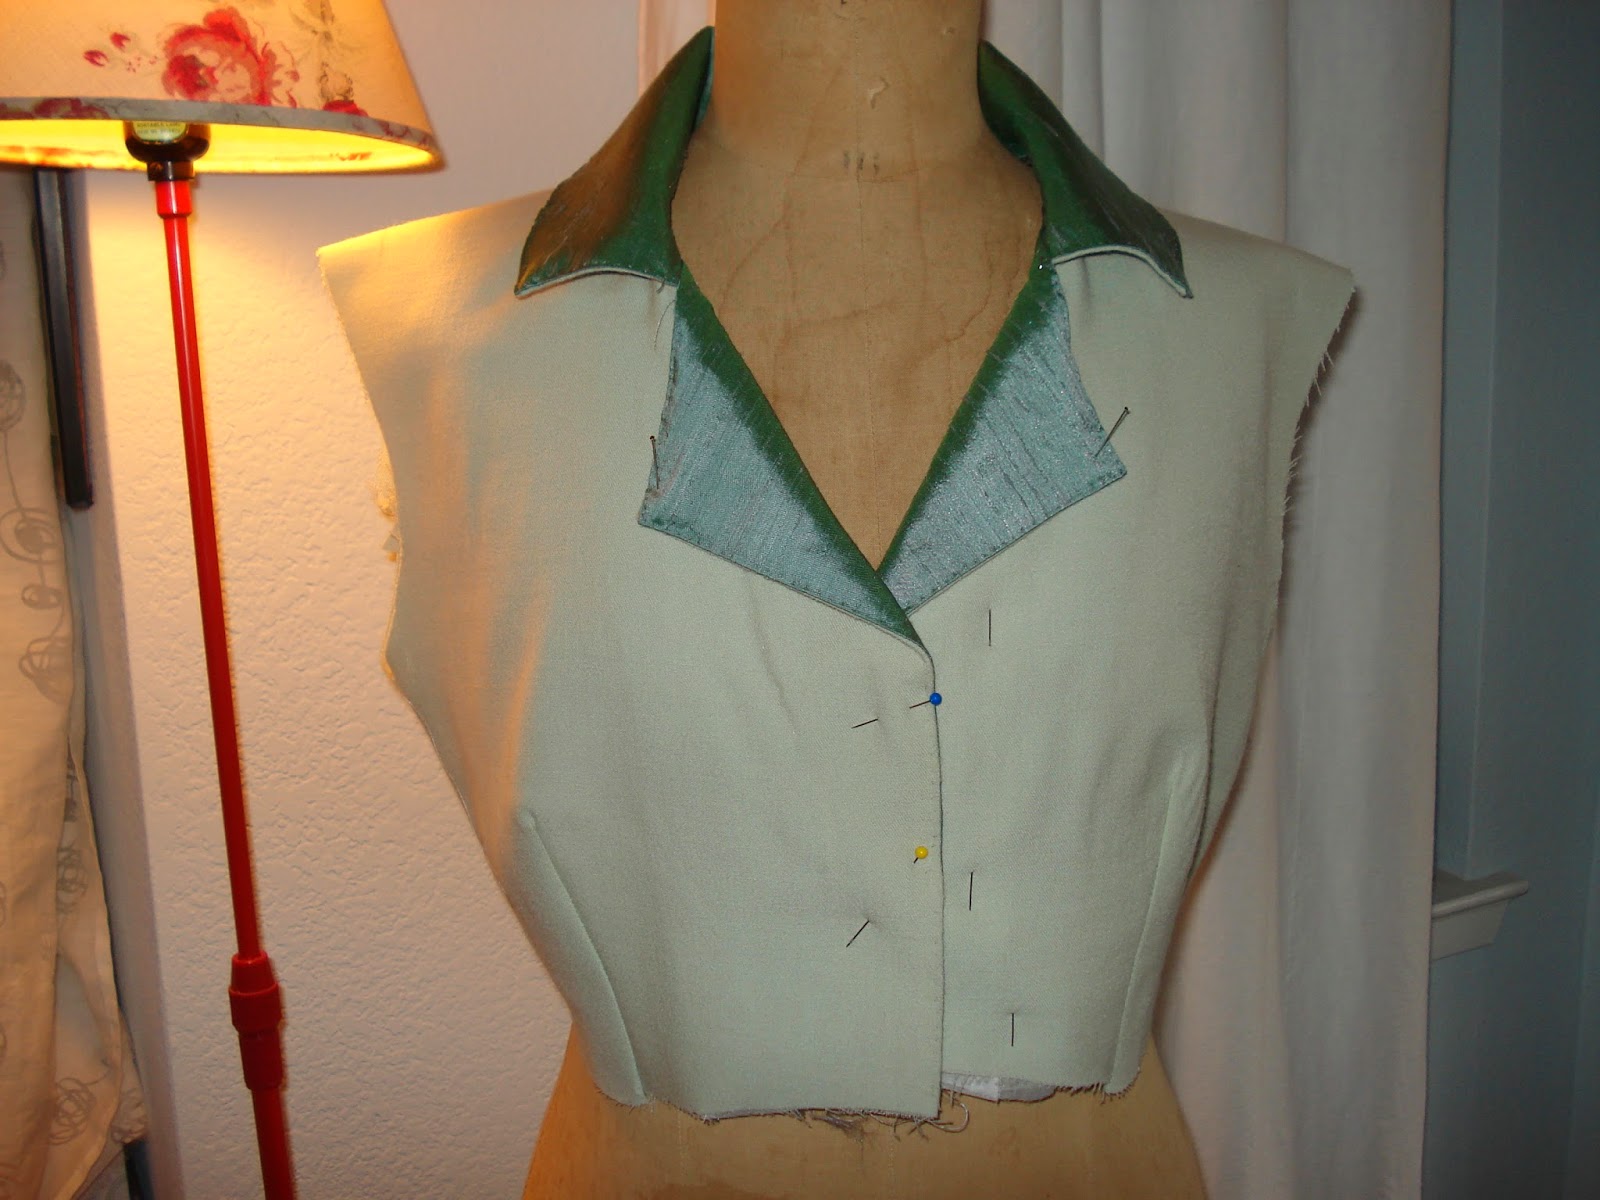
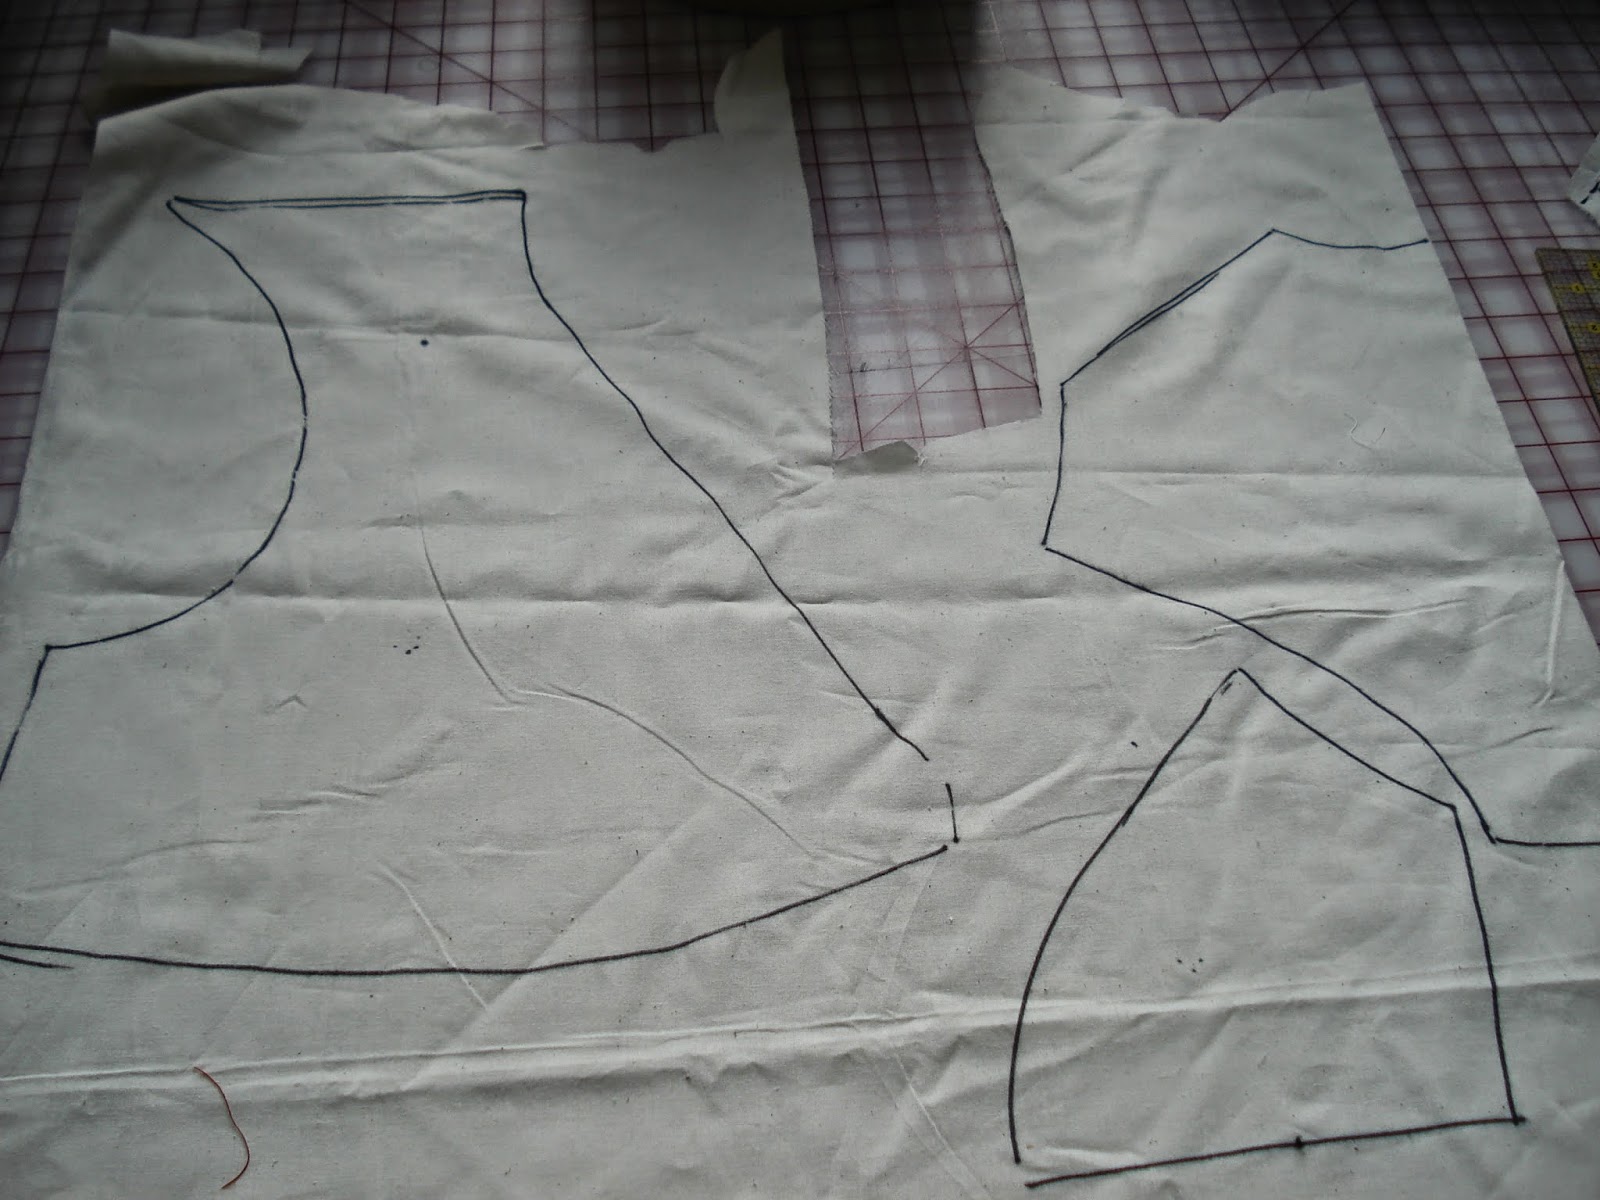
The pattern I am using is based on La Mode Bagatelle's spencer pattern with changes to make a sloper with a V-neck semi-surplice bodice: 

As the neckline would not accommodate a center back opening, I decided to do an apron front gown rather than a pelisse-dress. So, far so good.  I don't have pictures yet, but hope to by the next posting.

Once I finish this gown, I plan to turn my attention to a pelisse, two evening gowns and accessories.  If I am able to get through this basic wardrobe wish list, I will work on additional pieces to fill out my wearable options.  The question is, can I take them all?  Well, given that flights now only allow up to 50 lbs per checked bag and with my ticket I am allowed to check 2...I am not sure.  The wardrobe being a Regency one means less bulk and less heavy fabrics so what I will be able to take and manage my suitcases on my onesy will become known later on.

Till the next post, have a great day and I hope this post finds you well and prosperous.